

Dead Air Depth: Overview
This is one of the most dangerous areas in the game. Located deep underground, the primary access is via elevator. The entire zone has no oxygen (note: it is not underwater), making a Rebreather and Air Tank mandatory. Additionally, since the Air Tank is heavy and occupies the backpack slot, your carrying capacity is severely restricted. Currently considered end-game content, the main rewards are a few Military Crates and abundant Graphite ore.
- Difficulty: Game’s Highest Class (High risk of death)
- Environment: Not underwater, but zero oxygen. Rapid HP loss due to suffocation without gear.
- Essential Gear:
- Rebreather
- Portable Air Tank (1 to 2 tanks)
- Light Source: Headlamp (Lantern is an acceptable fallback)
- Recommended Tool: Lockpick
- Recommended Skills:
- Lockpicking: Lv 75 recommended.
- Strength: High level and weight capacity perks are highly recommended.
- Weight Penalty:Total approx. -90kg
- Backpack cannot be equipped as the slot is taken by the Air Tank (Loss of 60kg from Combat Pack).
- Weight burden of the Air Tank itself (30kg).
- Main Rewards:
- Dumped Military Crate x3
- Dumped Footlocker x2
- Improved Pickaxe
- Graphite, etc.
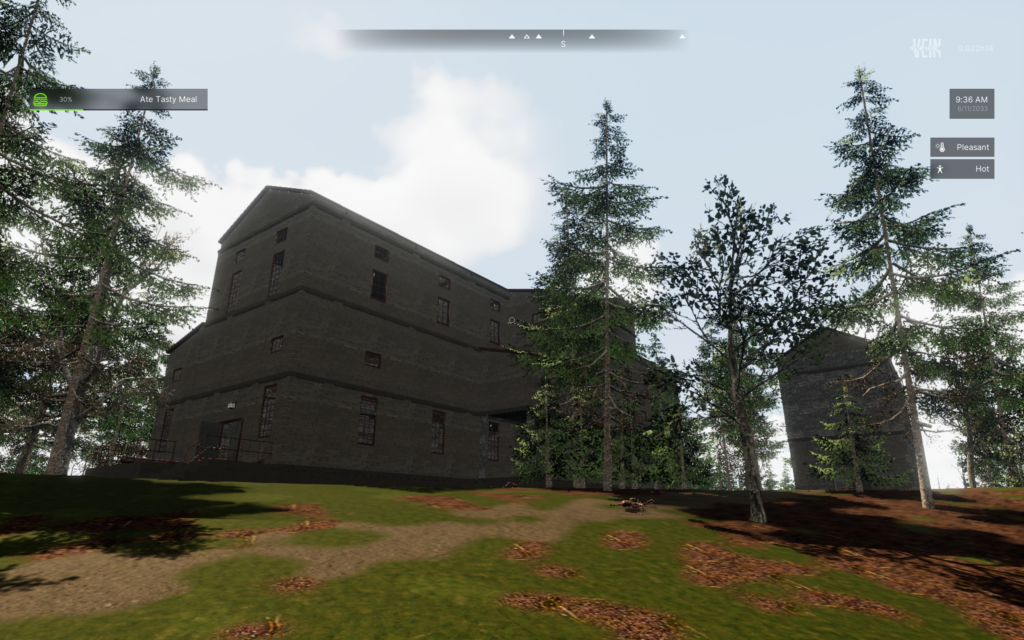
Location & Entry
The depths are accessible via the elevators at Mill No.3. You must descend twice by elevator to reach the Dead Air Depth.

Powering the Elevator
The elevator requires a generator to supply power. Choose one of the following methods based on your gasoline reserves.
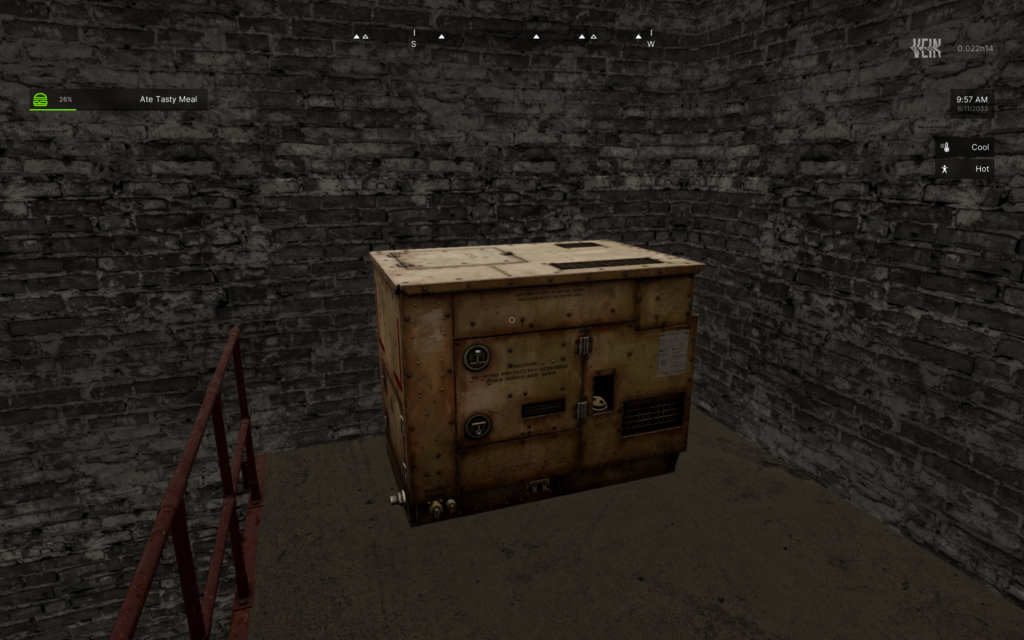
A. Using the Built-in Generator Use this if you have plenty of gasoline.
- Procedure: Climb the ladder on the outside of the Mill No.3 building to the roof, break the skylight to enter, and start the internal built-in generator.
- Risk: The generator on the surface runs continuously while you explore underground. If it runs out of fuel, the elevator stops, and you may not be able to return.
- Fuel Consumption: 1ml/sec. Capacity is 5000ml, so a full tank lasts about 80 minutes.

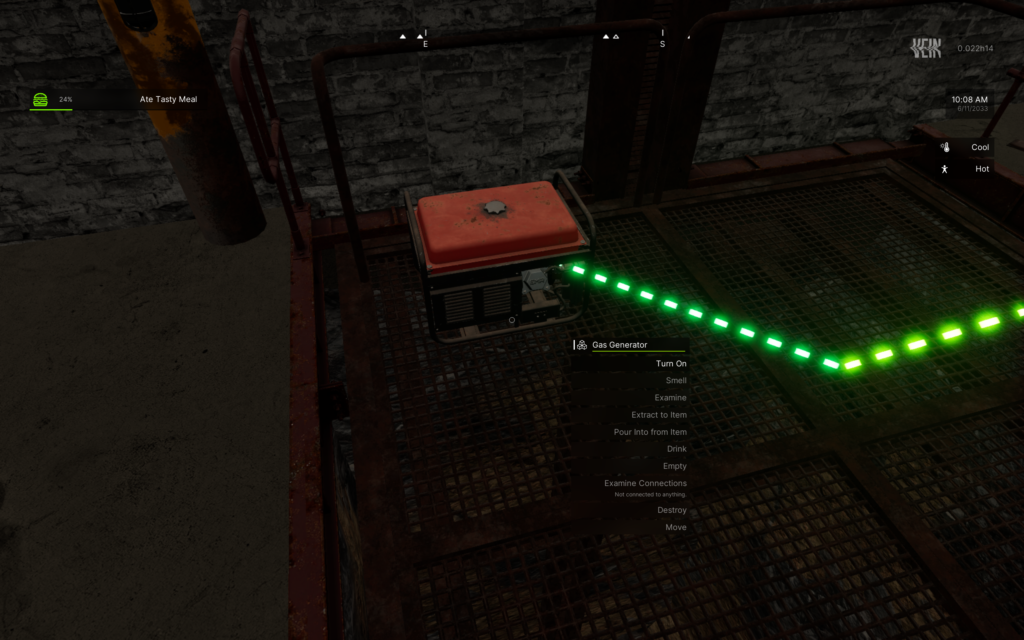
B. Bringing a Portable Generator Use this if gasoline is scarce or you have a portable generator.
- Procedure: Obtain your own generator → Place it on the elevator floor → Descend together → Turn the generator OFF upon arrival.
- Benefit: Avoids the risk of running out of fuel during exploration. Conserves gasoline (turn it OFF once you reach the bottom).
- Fuel Consumption: Same as the built-in type, 1ml/sec. Capacity is 2500ml.
🚨 [Not Recommended] The Drop Route
A trick entry route where you jump down from a different cave located above Dead Air Depth.
- Feature: Direct access to the room with the crates.
- Procedure: Carefully descend along the wall and jump down from a certain height.
- Risk: Guaranteed bone fracture upon landing. Since you cannot call the elevator for the return trip alone, there is a high possibility of being trapped. (Not recommended as it takes time, but it is a brute-force return method).
Cave Interior Map
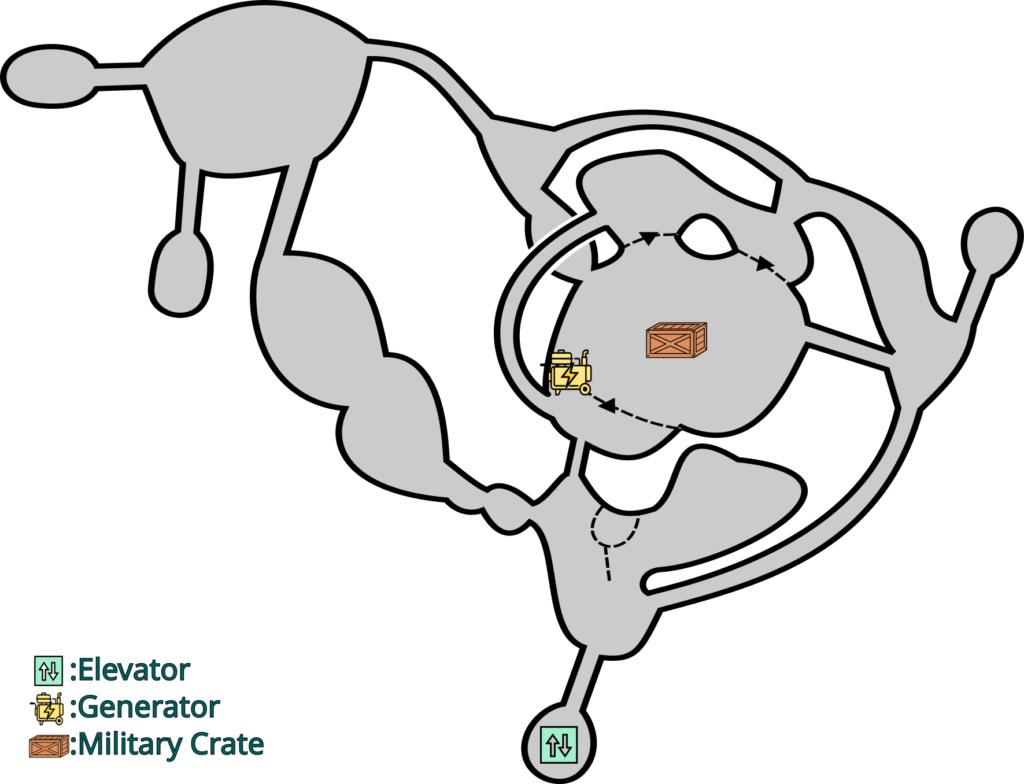
- Note: Ore locations are omitted.
Essential Equipment & Supplies
Entering without knowledge leads to an immediate dead end. It is recommended to challenge this area only after clearing the following conditions.
Oxygen Strategy
The cave is always in an anoxic (no oxygen) state.
- Equipment: Rebreather and Portable Air Tank are mandatory.
- Quantity: 1 tank if moving smoothly. 2 tanks are the safety zone for exploration, though very heavy.
- Suffocation Mechanics: Similar to being underwater; after a certain time, you enter a suffocation state, followed by rapid HP depletion.
Weight Penalty and Countermeasures
Since you must equip an Air Tank, your carry weight is drastically reduced. Simulate the state of removing your backpack and then subtracting another 30kg. If you cannot secure enough carry weight, it is recommended to level up your Strength skill before returning.
- No Backpack: Because the Air Tank takes the back slot, backpacks cannot be equipped. This is a loss of -60kg compared to a max expansion (Combat Pack).
- Tank Weight: The Air Tank itself weighs about 30kg.
- Total Penalty: You suffer a debuff of practically approx. -90kg.
- Required Stats: High “Strength” skill level and acquisition of carry weight increase perks. If these are insufficient, you will not be able to recover enough items.
You can also place a storage container on the elevator to help transport items and mitigate the carry weight limitation.
However, repeatedly moving items by raising and lowering the elevator is time-consuming, so it’s recommended to bring the materials needed to set one up in advance.
Fuel Strategy
Absolute condition for elevator operation.
- Gasoline Essential: Bringing gasoline is indispensable to power the generator in the cave.
- Risk of Gas Out: If fuel runs out during exploration, the elevator stops. Survival becomes impossible. Carry an amount with a margin of safety.
- Generator Prep: If you want to explore thoroughly, place a small generator on the elevator and turn it OFF after descending to avoid fuel consumption during exploration.
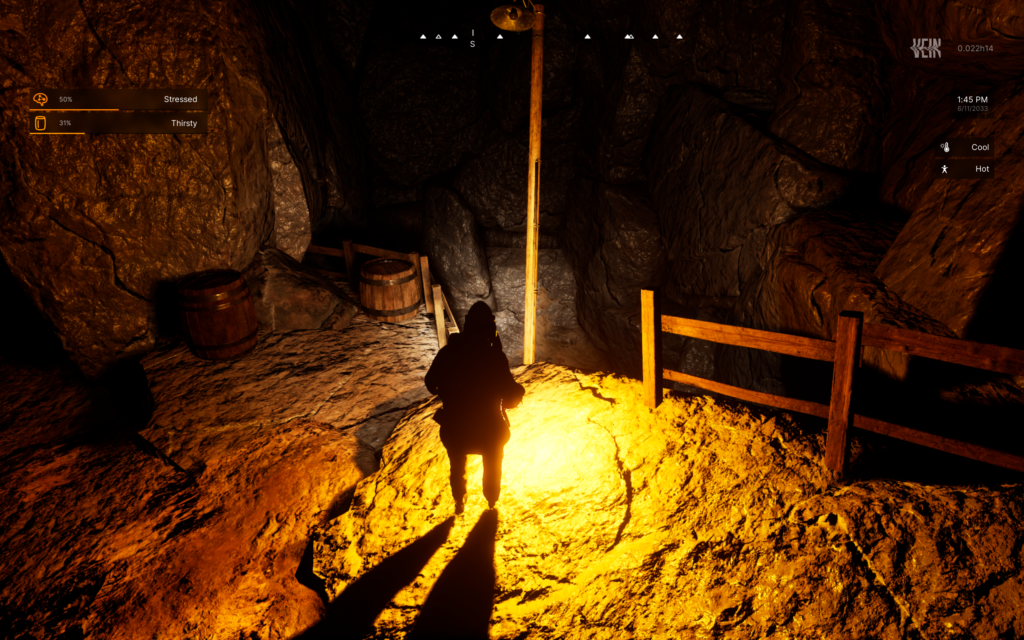
Lighting
The cave is pitch black. Exploration without a light source is extremely difficult. Operating the internal generator provides some light, but it is safer to bring your own.
- Recommended: Headlamp. Illuminates a wide range. Unlike a lantern, it keeps both hands free, making it the optimal solution for combat and exploration. (Location: Crates in factories or mines).
- Runner-up: Lantern. Sufficient light quantity, but occupies one hand, which is disadvantageous in combat.
- Not Recommended: Phone flashlight. The irradiation range is too narrow to grasp the terrain.
Rewards and Resources
This area contains Military Crates, Footlockers, and massive amounts of Graphite.
High-Tier Containers
- Targets: Military Crates and Footlockers.
- Required Skill: These two types of containers may require Lockpicking Lv 75. Level up sufficiently before challenging to ensure you can open all crates.

Mineral Resources
- Main Ore: Graphite is particularly abundant. Small amounts of Chalcopyrite and Bauxite are also present.
- Transport Strategy: Graphite is extremely heavy, so repeated transport is necessary. Gather it at the elevator and recover it later.
Bonus: Surviving a Fuelout – The “Barrel Stack Escape”
The only connection between Dead Air Depth and the surface is the elevator and a deep vertical shaft. If the fuel runs out and the elevator stops, you are cut off. However, return to the surface is possible if you have two barrels.
Escape Procedure
Prepare two barrels. Short types are not recommended due to poor efficiency.
- Place a barrel on top of another barrel and climb on top.
- Look down, move the bottom barrel, stack it on the top barrel, and climb on it.
- Repeat this simple process to gain altitude vertically (Brute force method).
Verification Data
- Time Required: Approx. 13 to 15 minutes of continuous work to return to the surface.
- Barrel Durability: Decreases with each stack, but even at 0 durability, they do not break and function as platforms.

© Ramjet Studios. Images and in-game content from ‘VEIN’ are used for commentary and educational purposes.

コメント
I would only add to this that there is a probability (possibly a guarantee, not sure about various loot settings) of finding an Improved pickaxe as well as an underwater headlamp down here. Also, if the elevator works with items placed on it such as the generator trick mentioned, it may be useful to bring or build a storage container to raise and lower with you.
Improved Pickaxe seems to be a fixed spawn, while the underwater headlamp appears to drop from Old Crates.
You can place a Storage Container on the elevator, so that’s a good idea.
I’ll update the article to reflect this.