

Getting Started | Best Profession
When starting the game, you must choose one of eight professions.
In practice, the differences between professions are very small, but Scholar is slightly better because of its starting equipment.
The differences between professions are:
- Skill bonus
- Starting equipment
Each profession starts with +5 in a different skill and a unique set of starting items.
However, skills can be leveled easily later, and a 5-point bonus is barely noticeable in actual gameplay.
Most starting equipment can also be crafted during the tutorial.
The only notable exception is the Scholar’s weapon, the Scroll of the Novice, which takes a bit longer to obtain normally.
For this reason, Scholar is the recommended profession.
Scholar starts with the Scroll of the Novice, allowing early access to magic-based ranged attacks.
Magic consumes stamina instead of ammunition, while also dealing higher damage than most other early-game ranged weapons.
As long as you are not surrounded, it allows you to defeat enemies safely from a distance and makes boss fights significantly less risky than melee combat.
Tutorial and Early Progression
During the early game, tutorial windows will appear regularly to explain basic controls and progression systems.
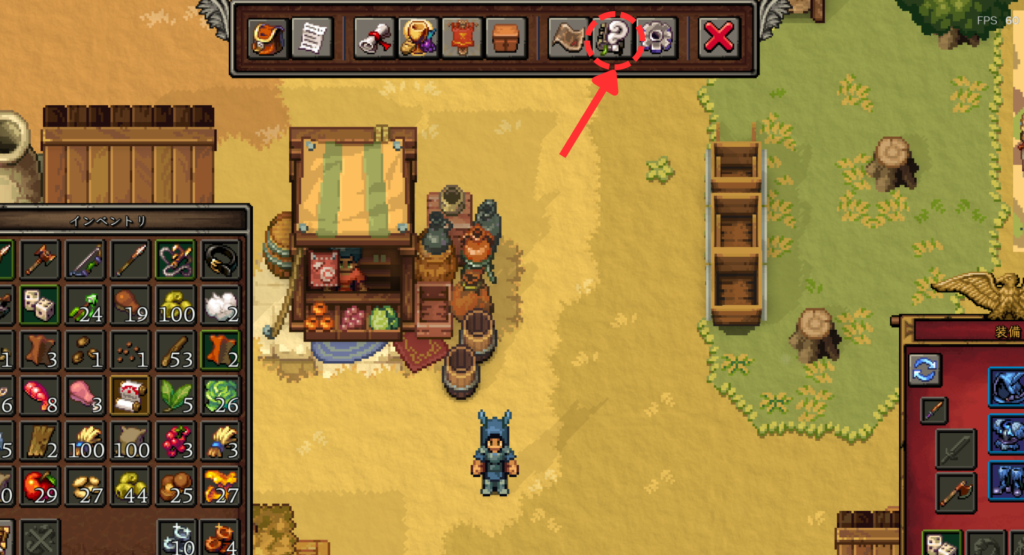
If you forget something or want to review the tutorials again, you can access them from the top menu after pressing the TAB key.
Controls and Hotkeys
Most basic controls and progression systems can be learned naturally by following the early tutorial.
However, some useful hotkeys are not explained very clearly, so it is worth checking them early.
Learning these shortcuts makes the game much more comfortable to play.
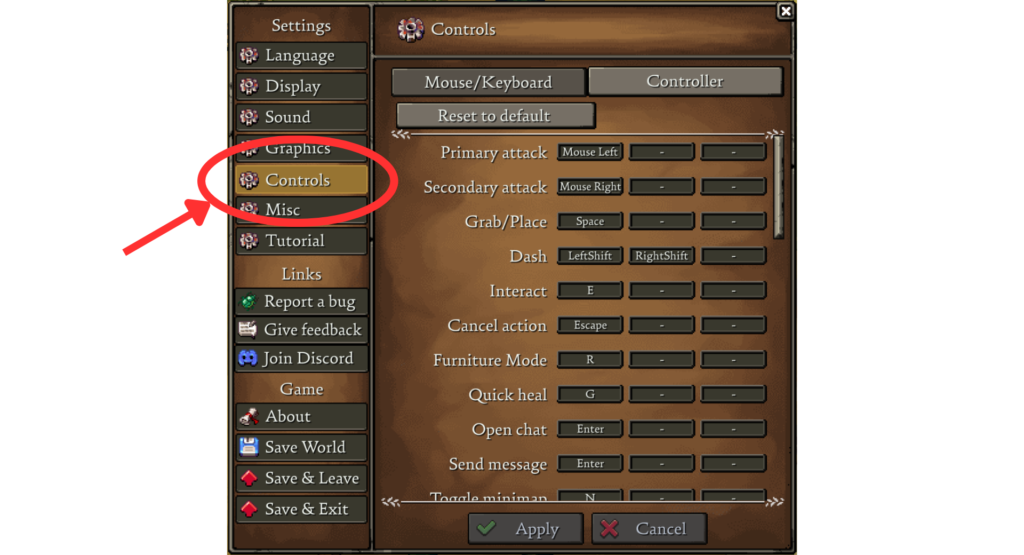
For example, if the minimap disappears, pressing the N key will toggle it back on.
Some interface-related problems can also be solved simply by checking the key bindings.
Useful hotkeys:
- Right Click: Use items / Equip gear / Transfer items between inventories
- SHIFT: Dash (Dodge)
- M: Open map
- N: Toggle minimap
- R: Toggle repair and demolition mode for structures
- Q: Quick drop (Drops one selected item from the inventory)
- Left Ctrl + Left Click: Split item stacks
What to Do After the Tutorial
If you are unsure what to do after finishing the tutorial, talk to the ghostly woman near the starting area.
She will continue giving progression hints and objectives.
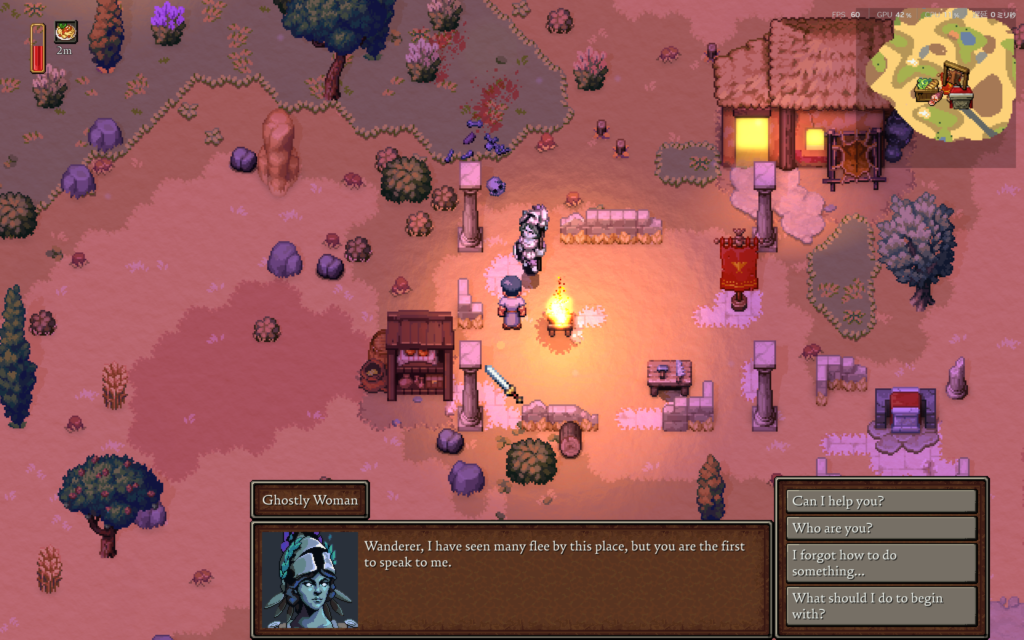
By following her guidance, you can naturally progress toward the first boss fight.
She also provides hints about the boss location, so if you get lost, return and speak with her again.
Easy Way to Defeat the First Boss
Players who are not comfortable with combat controls may struggle with the first boss, but there is a simple strategy that makes the fight much easier.
The recommended weapon is the Scroll of the Novice.
Using magic allows you to attack safely from a distance and greatly reduces the risk of taking damage.
If you still have trouble defeating the boss, lure it onto a stone road.
Movement speed increases while walking on stone roads, making it much easier to keep your distance while attacking.
Simply keep attacking while backing away to defeat the boss safely.
Offerings and Discovering Gods
By offering items at an altar, you can gain XP for different gods.
Increasing a god’s XP unlocks new World Quests and grants Worship Points.
Worship Points are used to unlock building upgrades, passive bonuses, and other useful effects.
When placing an item into the offering slot, one of the following will appear on the right side of the window:
- Undiscovered: The item has never been offered before, so its effect is still undiscovered.
- Icon and number: The item grants experience to a specific god.
- No display: The item has no offering effect.
In other words, you must offer an item at least once before its effect becomes visible. Once discovered, the result will be remembered and displayed permanently.
Each of the six gods prefers different types of items.
Without knowing these tendencies, discovering every god can take a long time, so here are some general examples:
- Ceres: Crops, fruits, seeds
- Diana: Meat, fur, mushrooms, bows
- Mars: Swords, spears, bones
- Mercury: Coins (Quadrans / Denarius)
- Venus: Chests, gems, potions, alcohol
- Vulcan: Ingots, coal
Food Supply for Citizens
Citizens are extremely useful because they can automate work when assigned to buildings, but they constantly consume food.
Here are some recommended ways to maintain a stable food supply.
Early Game | Hunting and Gathering
At the very beginning of the game, food production cannot be automated.
Because of this, the player must gather food manually and keep the food storage filled.
The easiest and most efficient method is hunting small animals.
Equip a ranged weapon such as a bow or the Scroll of the Novice, then hunt nearby animals like rats and rabbits.
Cooking the meat at a campfire is usually enough to feed a small population during the early game.
However, aggressive animals and monsters may attack while exploring, so it is recommended to carry some cooked meat for healing.
Food Automation
Once your settlement develops further, food production can be partially automated.
The following buildings are required:
- Farmstead
- Farmland
- Watermill
- Bakery
- Logistics Tent
Note that the Watermill must be placed next to a 2×4 area of water.
Also, fuel for the Bakery’s Furnace must still be supplied manually with logs, as it cannot currently be automated through the logistics system.
Unlocking all of these buildings requires progressing through several World Quests.
Once all five buildings are available, food automation can be set up as follows:
- Obtain wheat seeds.
- Place the seeds into the Farmland inventory.
- Set crop maintenance tasks to Repeat.
- Set bread production in the Bakery to Repeat.
- Connect the logistics routes in this order:
Farmstead → Watermill → Bakery → Food Storage
How to Create Logistics Routes
- Access the Logistics Tent.
- Drag from the red export icon on the source building.
- Drop onto the green import icon on the destination building.
- Enable the required options when creating the logistics route. For this setup, only Repeating and Item need to be checked.
For this setup, Continuous and Item are enough.
Raid | Base Defense
As your settlement grows, defending the town becomes increasingly important.
Large enemy waves will eventually attack, and surviving without defensive structures becomes very difficult.
Here are some useful defensive structures and placement tips.
Base Defense Tips
Things to Check Before Starting a Defense Battle
Before starting a defense battle, make sure that Furniture Repair/Demolition mode is turned off by pressing the R key.
If it is enabled, your attacks can damage your own structures.
When the mode is turned off, normal attacks can also be performed safely through walls.
This applies not only to normal attacks, but also to defensive structures such as Catapults.
After the battle ends, turn Furniture Repair/Demolition mode back on to repair damaged walls and other structures.
Vulcanus Upgrade Tree
Several upgrades in the Vulcanus upgrade tree are especially useful for defense battles, including stronger walls and the Auto Scorpio.
These upgrades can be unlocked by spending Worship Points at the altar.
Stone Walls are especially recommended, as they have twice the durability of Wooden Walls while only changing the required material from logs to stone.
They also greatly increase your settlement’s defense rating, which helps improve citizen happiness as an additional benefit.
Defensive Structures
Wooden Walls
Wooden Walls are the foundation of early defenses and should be used to surround the settlement.
They have 200 durability, but enemies can still destroy them fairly easily during larger attacks.
Vulcanus upgrades can improve wall durability and eventually unlock Stone Walls.
Barricades
Barricades can be crafted manually or produced automatically by a Carpenter.
They have 50 durability and work especially well with Auto Scorpios.
Unlike walls, Barricades can be attacked while still allowing ranged defenses behind them to fire freely.
Catapults
Catapults can attack over walls, making them very strong when placed behind defensive lines.
They can also deal area damage to groups of enemies around the impact point.
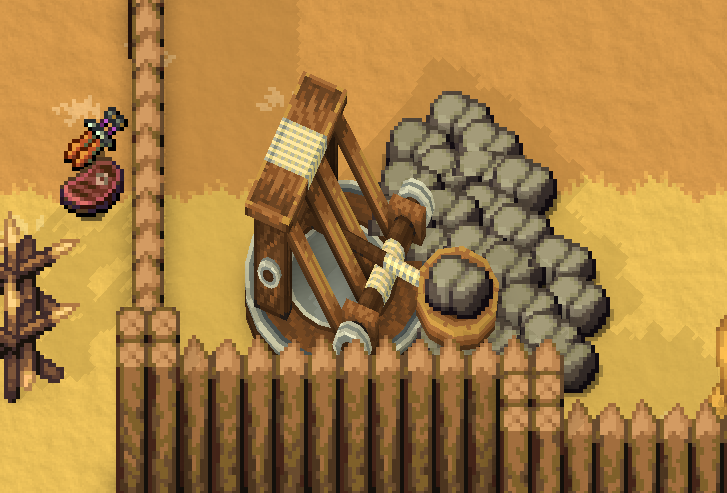
Placing stone ammunition nearby allows automatic reloading, which greatly improves sustained defense.
It is also recommended to build additional walls around Catapults.
If another section of the base is breached, this creates a secondary defensive position where you can retreat safely.
Do not forget to add doors for access.
Automatic Scorpio
The Auto Scorpio automatically attacks enemies as long as arrows are supplied.
However, its arrows cannot pass through walls.
Because of this, surrounding it with Barricades is usually more effective.
Unlike walls, Barricades do not block Auto Scorpio arrows, allowing the weapon to attack enemies safely from behind cover.
A useful setup is to protect the front with Barricades while placing a door behind the Auto Scorpio for safe access and arrow resupply.
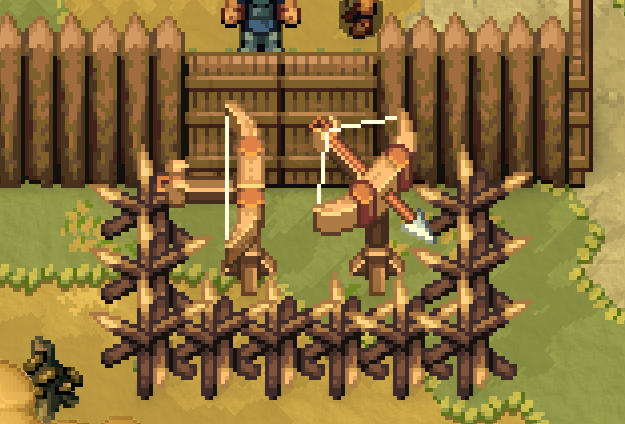
A common setup is to protect the front with Barricades while placing a door behind the weapon for safe access and arrow resupply.
Beginner Tips
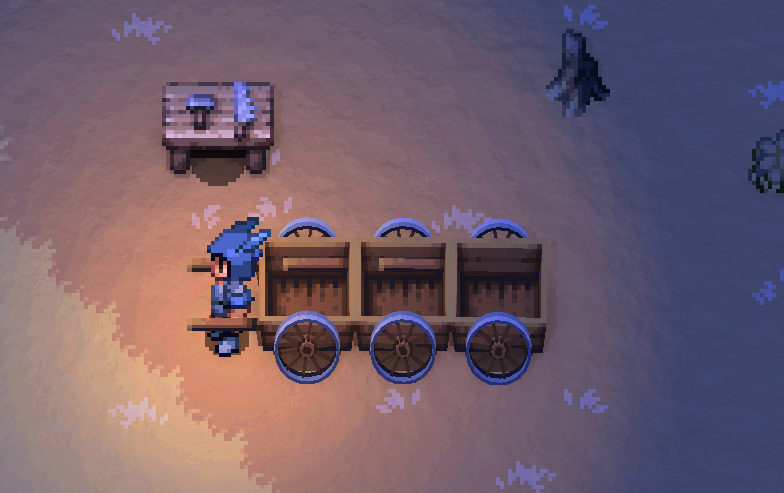
Wagons Can Be Connected
Wagons can be connected by pushing them into each other.
This is especially useful for transporting large amounts of logs and stones over long distances.
How to Make Copper Ingots
The tutorial does not explain this clearly, but the Furnace outside the Blacksmith can be used by directly inserting fuel and ore.
To automate the process, the Quarry worker must first be upgraded to level 2.

The Bakery works in a similar way, allowing fuel to be inserted from outside the building.
Logs last a long time as fuel, so using them is recommended.
Setting a Respawn Point | Camping Tent
After unlocking the Diana upgrade “Camping Tent,” the Leatherworker can craft Camping Tents.
By placing and using a Camping Tent, it can be set as your respawn point.
It is recommended to always carry one when traveling long distances or challenging bosses, as it prevents you from respawning back at your main base after dying.
Camping Tents can also be recovered by destroying them, allowing them to be reused multiple times.
Desert / Volcano Biome Locations
Because the world is procedurally generated, the exact locations of biomes differ in each world.
However, there are roads that can be used as landmarks.
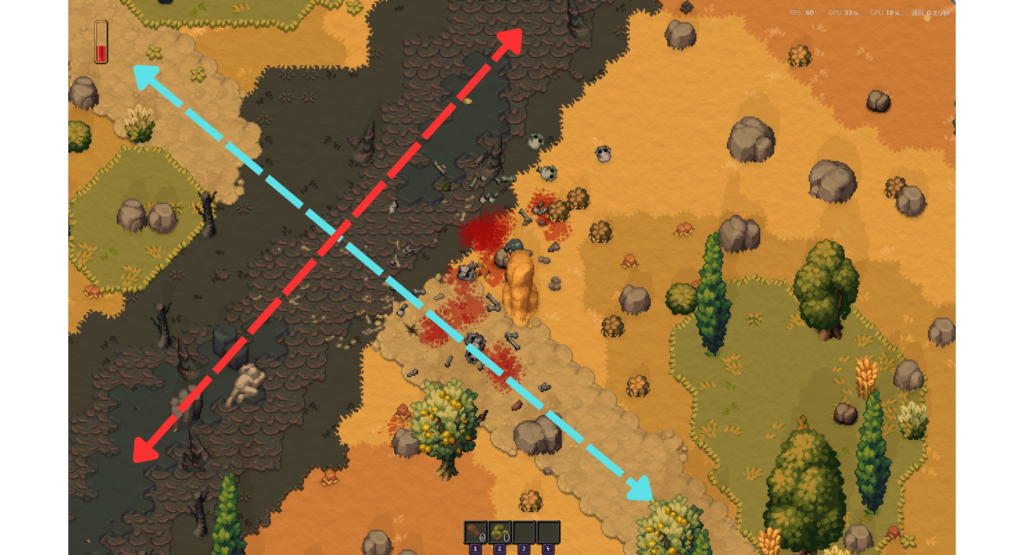
The road leading to the Desert biome is the stone road that extends outward from the starting area.
The Volcano biome can be found by following the black road. However, you will need to explore to determine which direction the road leads.
Both biomes are located far from the starting area, so make sure to bring healing items and a Camping Tent before setting out.
Screenshots and gameplay footage featured in this article are the property of Beartwigs / Three Friends.
They are used for Romestead guide and commentary purposes.

コメント